
Heritage Renovation Facade Moulding Solutions Guide
Table of Contents
- Why Facade Moulding Matters in Heritage Renovation
- Choosing Period Home Exterior Mouldings by Architectural Style
- Heritage Facade Restoration: Approvals and Conservation Requirements
- Step-by-Step Facade Moulding Assessment and Repair
- Lightweight Exterior Mouldings vs Timber and Plaster Replacements
- Facade Moulding Installation: What the Job Actually Involves
- Costs, Weatherproofing and Long-Term Maintenance
- Conclusion
- Frequently Asked Questions
Last Updated: October 16, 2026
Why Facade Moulding Matters in Heritage Renovation
Facade moulding covers the decorative and functional profiles fixed to a building's exterior: cornices, architraves, window sills, stringer courses, quoins and bargeboards. At Outside Mouldings, we supply Australian-made exterior profiles to renovators who want that character back without a full masonry rebuild.
Heritage renovation facade moulding solutions matter because facade detail is what makes an old house read as an old house. According to the Australian Institute of Architects, adaptive reuse and conservation projects have grown steadily as owners weigh the carbon and character benefits of retaining original fabric.
Reading the Architectural Character of Your Home
Before you order anything, learn to read what you already have: original features tell you the period and profile family the house was designed around.
Look for:
- Eave moulds running under the roofline, often the largest profile on the facade
- Window architraves framing openings, sometimes with a separate sill beneath
- Corner quoining on external corners, either structural or purely decorative
A common mistake is replacing one missing profile with something close enough. Profiles are designed as a set. A heavy cornice paired with a thin architrave looks wrong even to people who cannot say why.

Corner Quoining 300x300x250x2500x40mm
Choosing Period Home Exterior Mouldings by Architectural Style
Period home exterior mouldings are not interchangeable across eras. Colonial, Queenslander and Interwar homes each carry distinct profile language, and matching it preserves architectural character.
Colonial, Queenslander and Interwar Profiles Compared
Period |
Typical Profiles |
Character Notes |
Common Failure Point |
|---|---|---|---|
Colonial |
Simple ogee cornices, flat bands, plain sills |
Restrained, symmetrical, low projection |
Render loss at sills |
Queenslander |
Wide eave moulds, deep bargeboards, timber architraves |
Deep shading, verandah detail, lightweight timber |
Termite damage to timber |
Interwar |
Stepped cornices, decorative plasterwork, textured bands |
Bolder ornament, geometric shapes |
Cracking plasterwork |
Colonial profiles are easiest to replicate because the shapes are simple. Queenslander detailing is hardest to fake, because the deep eave and barge profiles do so much visual work. Interwar homes carry cast decorative elements with finer relief.
If your home sits between periods, pick the dominant language and stay consistent. Half a Queenslander eave and half a modern band reads as neither.
Heritage Facade Restoration: Approvals and Conservation Requirements
Heritage facade restoration may require approval before you start, and rules differ by state, territory and council. A heritage-listed property or one inside a heritage overlay usually needs a permit for external alterations, even repairs.
The practical sequence:
- Check whether your property is individually listed or inside a heritage overlay
- Request the local council's heritage citation or conservation management plan
- Confirm whether your works are exempt maintenance or require a permit
The guiding principle in most conservation frameworks is to retain original fabric wherever possible and to make new work reversible. That does not mean you cannot replace a rotten sill.
Step-by-Step Facade Moulding Assessment and Repair
Facade moulding assessment is a five-step process: survey, document, diagnose, repair or replace, then finish and protect.
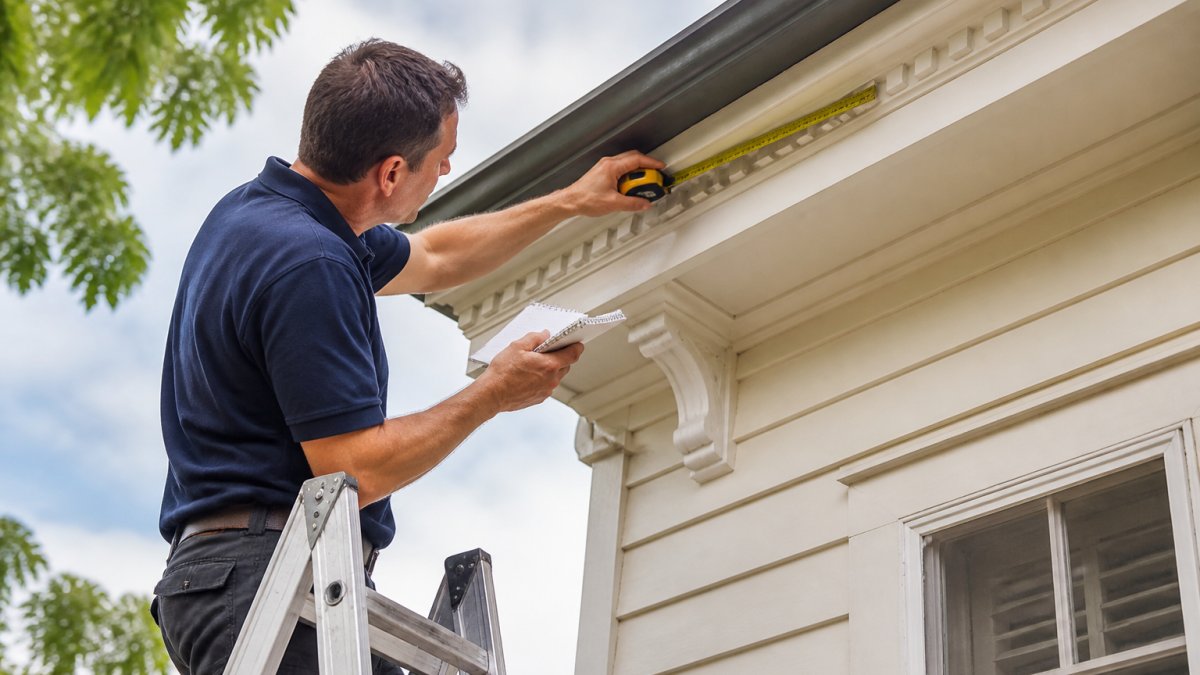
Diagram showing the step-by-step process for measuring and assessing exterior decorative cornice profiles
Step 2: Document each profile. Record depth, projection, height and shape. Photograph with a tape measure in frame.
Step 4: Repair or replace. Small cracks and isolated render loss can be patched.
Step 5: Finish and protect. Paint is the weatherproofing layer. An unpainted profile in a harsh climate will not last.
Documenting Profiles, Measurements and Photographs
Your documentation is what a supplier needs to match or replicate a profile.
Record for each profile:
- Overall depth and projection in millimetres
- Height of the profile face
- Shape description or a traced outline
A side-on photo with a tape measure lets a supplier read the curve of an ogee or the step of a banded cornice.
Lightweight Exterior Mouldings vs Timber and Plaster Replacements
Lightweight exterior mouldings made from expanded polystyrene with a sand-blend render coating are now the practical default for facade restoration in Australia, delivering the look of traditional rendered masonry without the weight or trade skills. But the right material depends on where the profile sits, what the heritage citation requires, and how much maintenance you will do.
How the Three Options Compare
Material |
Appearance |
Weight and Handling |
Durability |
Maintenance |
Best Facade Locations |
|---|---|---|---|---|---|
Timber |
Traditional, takes paint well, visible grain unless primed and sanded |
Light, easy to cut on site |
Can check, split and swell; vulnerable to termites and fungal decay |
Repaint every 5-7 years; check for borer and termite activity annually |
Queenslander architraves, bargeboards, verandah trim, sheltered eaves |
Plaster |
Closest match to original decorative plasterwork and fine relief |
Heavy and brittle; usually needs two people and careful support |
Cracks with substrate movement; spalling in exposed or damp locations |
Patch cracks as they appear; repaint on the same cycle as the facade |
Sheltered cornices, interior-adjacent detailing, highly ornate profiles |
Lightweight polystyrene with render coating |
Smooth rendered finish; reads as masonry or painted timber from street level |
Very light; standard 2.5m lengths can be handled solo |
Resists moisture and termite attack; will not rot |
Repaint every 7-10 years; inspect joins and fixings after severe weather |
Exterior Cornices, bands, architraves, sills, quoins, exposed western walls |
Choosing by Exposure, Not Just Appearance
A profile under a deep eave sees far less weather than one on an exposed western wall, and that difference should drive the material and fixing choice.
Decorative Exterior Moulding : 200x160 Profile - OI2502F →
Where a heritage citation specifically requires a traditional material, that requirement overrides the practical argument. Confirm this before you order: substituting a lightweight profile for a specified timber or plaster element can trigger a council enforcement notice.
Repair or Replace?
Material choice and the repair-versus-replace decision are linked. If more than roughly a third of a run has lost its section, gone soft or detached from the substrate, replacing the whole run usually costs less over ten years than repeated patching. Isolated cracks and single failed joins can be patched with a matching patch kit and repainted.
Matching the Original Profile
Whichever material you choose, the replacement must match the original in profile, projection and material appearance. A lightweight profile can replicate a timber or plaster shape accurately, but the supplier needs a side-on photograph with a tape measure in frame, plus overall depth, projection and run length in millimetres.
Facade Moulding Installation: What the Job Actually Involves
Facade moulding installation is simpler than most owners expect, but the joins are where the job succeeds or fails. This sequence assumes you have already surveyed the facade, documented each profile and confirmed approvals.
Step-by-Step Installation Sequence
- Set out and mark your lines. Use a level and string line to establish a consistent datum around the facade. Profiles that step up or down by even a few millimetres are visible from the street.
- Cut profiles to length. A fine-tooth saw gives the cleanest cut through the render coating. Cut slightly long and trim to fit rather than cutting short.
- Dry-fit every piece. Check the run, the mitres and the joins before any adhesive is opened. This is the cheapest opportunity to fix a mistake.
- Prepare the substrate. Remove loose render, dust and flaking paint. A sound, clean, slightly roughened surface gives the adhesive something to key into.
- Apply adhesive An external-grade construction adhesive to the substrate is standard. Fixing methods must suit the substrate and profile size.
- Join lengths using the patch kit. Blend the join while the patch material is still wet. A visible butt joint on a long run undoes the whole effect.
- Sand back lightly once dry. Repeat the patch and sand sequence if the join is still visible.
- Paint. Paint is the weatherproofing layer. An unpainted profile in a harsh climate will not last.
Substrate and Fixing Considerations
Different substrates need different approaches. Fixings should allow slight movement rather than locking the profile rigidly.
Our National Construction Code sets the broader performance framework for external building elements, and any fixing method needs to suit your substrate and the wind loads of your location.
Weatherproofing and Long-Term Maintenance
Weatherproofing comes down to three things: correct fixing, sealed joins and paint. Keep gutters clear, check sills and joins after storms, and repaint on the same cycle as the rest of the facade. Water ingress is the most common cause of premature failure, so watch the junction between profile and substrate, and the top edge of any horizontal run where water can sit.
Walk the facade after every major storm, check joins for movement or cracking, and touch up paint damage before moisture gets behind the coating.
How Long Does It Take?
For a typical single-storey facade with cornice, architraves and sills, budget a week, plus drying time between coats. Larger profiles, two-storey work and custom replication add time, so factor in safe access at height.
Costs, Weatherproofing and Long-Term Maintenance
Costs scale with run length, profile size and custom replication. Our standard profiles come in 2.5m lengths: measure your total run in metres, divide by 2.5, and round up.
Some current examples from our range:
Product |
Profile |
Price (per 2.5m length) |
Best For |
|---|---|---|---|
200x100 |
$93.50 |
Mid-size cornices and bands |
|
140x70 |
$65.45 |
Architraves and stringer courses |
|
Window sill |
$48.51 |
Sill replacement with character |
|
50mm band |
$42.10 |
Window surrounds and trims |
|
Accessory |
$25.00 |
Joins, mitres and exposed ends |
Larger profiles cost more because there is more material and coating. Our Decorative Exterior Moulding 300x177 - OID356 is $166.88 per length, and Corner Quoining is $399.30 for a 2.5m length.


Conclusion
Heritage facade work rewards patience more than budget. Survey properly, document every profile, confirm approvals, and choose materials that suit the exposure of the location.
Outside Mouldings makes all our exterior profiles in Australia, from precision-cut expanded polystyrene with a fine sand-blend render finish. We stock a large standard range in 2.5m lengths and specialise in custom-made profiles for heritage work where the original shape is no longer available.
Get started with Outside Mouldings and bring the detail back to your facade.
Frequently Asked Questions
How do you choose mouldings for a heritage home facade?
Start by identifying your home's architectural period, then photograph and measure existing profiles before anything is removed. Match cornices, window architraves and sills to the original style rather than a generic modern profile. If the original pattern is no longer stocked, custom-made profiles can replicate it. Always check whether heritage approvals apply before ordering, and keep samples of retained original fabric for comparison.
Can lightweight exterior mouldings suit a heritage renovation?
Yes. Expanded polystyrene mouldings with a sand-blend render coating are cut to match period profiles and finished to look like traditional rendered masonry. They suit heritage facade restoration because they can be custom-shaped to replicate original decorative plasterwork, weigh far less than timber or plaster, and install quickly in standard 2.5m lengths without specialist masonry skills. The render-look coating is durable and weather-resistant once painted.
What should you check before changing mouldings on a heritage-listed home?
Confirm whether your property is heritage-listed or sits within a heritage streetscape overlay, because both can trigger approval requirements. Contact your local council or heritage advisor before removing or altering any street-facing facade element. Generally, retaining original fabric is preferred, and replacements should match the original profile and proportions. Document existing mouldings with measurements and photographs so any replacement can be assessed against what was there.
How do you maintain exterior mouldings on an older home?
Check joins, mitres and exposed ends each year for cracks or moisture entry, and reseal them with a patching compound. Keep the paint coating intact, since it protects the render finish from sun and rain. Clear leaf litter from behind bargeboards and eaves so water drains away. If termites or rot have damaged timber mouldings, replace the affected sections rather than patching over the problem.

Comments