
Professional Grade DIY Facade Mouldings: 2026 Review
Table of Contents
- What Professional Grade Really Means for DIY Facade Mouldings
- Polystyrene vs Masonry Mouldings: A Side-by-Side Comparison
- Weather-Resistant Architectural Mouldings: What Survives Australian Conditions
- Exterior Window Sill Materials: Choosing the Right Profile
- DIY Exterior Moulding Installation: A Step-by-Step Guide
- Project Cost and Budgeting for Facade Mouldings
- Conclusion: Is Professional Grade DIY Right for Your Project?
- Frequently Asked Questions
Last Updated: October 13, 2026
What Professional Grade Really Means for DIY Facade Mouldings
Professional grade DIY facade mouldings are exterior decorative profiles manufactured to a consistent density, coated with a flexible weather-resistant render finish, and supplied in uniform lengths that install without specialist masonry skills.
At Outside Mouldings, we manufacture every profile in Australia from precision-cut expanded polystyrene with a sand-blend render coating. That construction is what lets a homeowner achieve the depth and shadow lines of traditional rendered masonry without hiring a renderer.
The measurable criteria
Rather than trust a label, ask a supplier for these five things. A trade-quality product will have an answer for each.
- Density. Ask for the core density in kg/m³. Budget decorative trim often sits below 15 kg/m³ and crushes at the corners; professional-grade EPS for exterior facade work typically sits in the 15-25 kg/m³ range, with high-density foam and urethane higher again. Density is the single best predictor of how a profile handles knocks and how crisp the cut edge stays.
- Coating type and flexibility. A flexible render or acrylic coating expands and contracts with the substrate. Rigid, cementitious coatings crack when the wall moves. Ask whether the coating is flexible, and ask for the dry film thickness, thicker is not automatically better, but a coating under about 1 mm offers little protection against UV and impact.
- Dimensional accuracy. Profiles should be cut to a consistent length and cross-section. Ask for the tolerance on length and profile dimensions. A supplier quoting tolerances of a few millimetres is working to a tighter standard than one who cannot answer.
- Impact resistance. There is no single standard test, but a supplier should be able to describe how the profile performs against a sharp knock and what happens if it is dented, whether the core crushes or the coating chips.
- Warranty. A written warranty covering the coating against cracking, flaking and delamination for a defined period is the clearest signal that the manufacturer stands behind the product. Ask what the warranty excludes, particularly around unsealed cuts and joins.
How to check before you buy
- Request a sample length and cut it. A clean, crisp edge with no crumbling indicates a well-fused core.
- Flex the coating on the sample. It should bend without cracking.
- Measure two lengths from the same order. Consistent length means fewer visible joins across a facade.
- Ask what happens at an end cut. A supplier who explains sealing requirements is selling a system, not just a profile.
What professional grade is not
It is not a synonym for expensive, and it is not a guarantee of a good result. A professional-grade profile fixed to a dirty, friable substrate with unsealed cuts will fail just as fast as a budget one. The product sets the ceiling; the installation decides whether you reach it.
Polystyrene vs Masonry Mouldings: A Side-by-Side Comparison
Factor |
Expanded Polystyrene (EPS) |
High-Density Foam |
Urethane (PU) |
Cast Stone / Masonry |
|---|---|---|---|---|
Typical density |
Low, around 15-25 kg/m³ |
Mid, around 30-45 kg/m³ |
Mid to high, 40-60 kg/m³ |
Very high, 1,800-2,200 kg/m³ |
Weight per 2.5m length |
Light, one-person lift |
Light, one-person lift |
Light to moderate |
Heavy, two-person minimum plus lifting gear |
Surface finish |
Sand-blend render coating over the core |
Smoother foam, often pre-primed |
Hard skin, paint-ready |
Natural stone or rendered |
Impact resistance |
Moderate; dents under sharp impact |
Better than EPS; resists knocks |
Good; hard outer skin |
Excellent but brittle under movement |
Thermal movement |
Moves with the wall |
Moves with the wall |
Moves with the wall |
Low movement, cracks if substrate shifts |
Moisture behaviour |
Needs sealed cuts and joins |
Needs sealed cuts and joins |
More moisture-tolerant |
Porous; needs sealing and repointing |
Installation method |
Adhesive plus mechanical fixings |
Adhesive plus mechanical fixings |
Adhesive plus mechanical fixings |
Mortar bed and mechanical support |
Specialist skills |
Basic DIY |
Basic DIY |
Basic DIY |
Masonry or rendering trade |
Time per 2.5m length |
Minutes |
Minutes |
Minutes |
Hours, plus curing |
Repair approach |
Patch and repaint |
Patch and repaint |
Patch and repaint |
Chip and repoint |
Best use |
Rendered facades, window surrounds, cornices |
Fine detail, sharper profiles |
High-traffic or exposed profiles |
Heritage restoration, solid-stone matching |
For homeowners and owner-builders, the weight difference is the deciding factor. A single person can carry, position and fix a lightweight EPS moulding without scaffolding for single-storey work.
For everything else, lightweight profiles do the same visual job faster and at a fraction of the structural load on the wall.
A common pattern is to mix materials on one facade: EPS for the long horizontal runs and window surrounds.
Weather-Resistant Architectural Mouldings: What Survives Australian Conditions
Weather-resistant architectural mouldings need to handle UV, driving rain, salt air and temperature swings without cracking or delaminating. The coating does the heavy lifting here, not the core.
A flexible render coating expands and contracts with the substrate beneath it. Rigid coatings do not, which is why cheap exterior mouldings often show hairline cracks after a couple of seasons.
When assessing any profile for exterior use, check these points:
- Coating flexibility rather than hardness
- UV stability of the topcoat once painted
- Correct sealing at every join and end cut
- Substrate suitability, since movement in the wall transfers to the moulding
The most common failure we see is not the product. It is an unsealed end cut letting moisture wick into the core. Seal every cut face before fixing and the profile will outlast the paint on it.
Exterior Window Sill Materials: Choosing the Right Profile
Exterior window sill materials fall into broad groups, including lightweight coated profiles. Each suits a different budget and skill level, and the right choice depends on how much maintenance you are willing to take on.
Lightweight coated profiles give you the rendered look with none of the weight.
Profile selection matters as much as material. A deeper sill projects further, throws a stronger shadow line and sheds water better.
For window surrounds and architraves, match the sill depth to the surround width so the whole opening reads as one designed element rather than three separate purchases.
DIY Exterior Moulding Installation: A Step-by-Step Guide
DIY exterior moulding installation is a same-day job for most single-storey facades if you plan the layout before you open the adhesive. Work in shade, dry weather and above 10°C.
Decorative Exterior Moulding : 200x160 Profile - OI2502F →
What you'll need: measuring tape, spirit level, mitre box and saw, construction adhesive, exterior sealant, Patch Kit, caulking gun. A drop saw can also be used with a fine tooth blade.
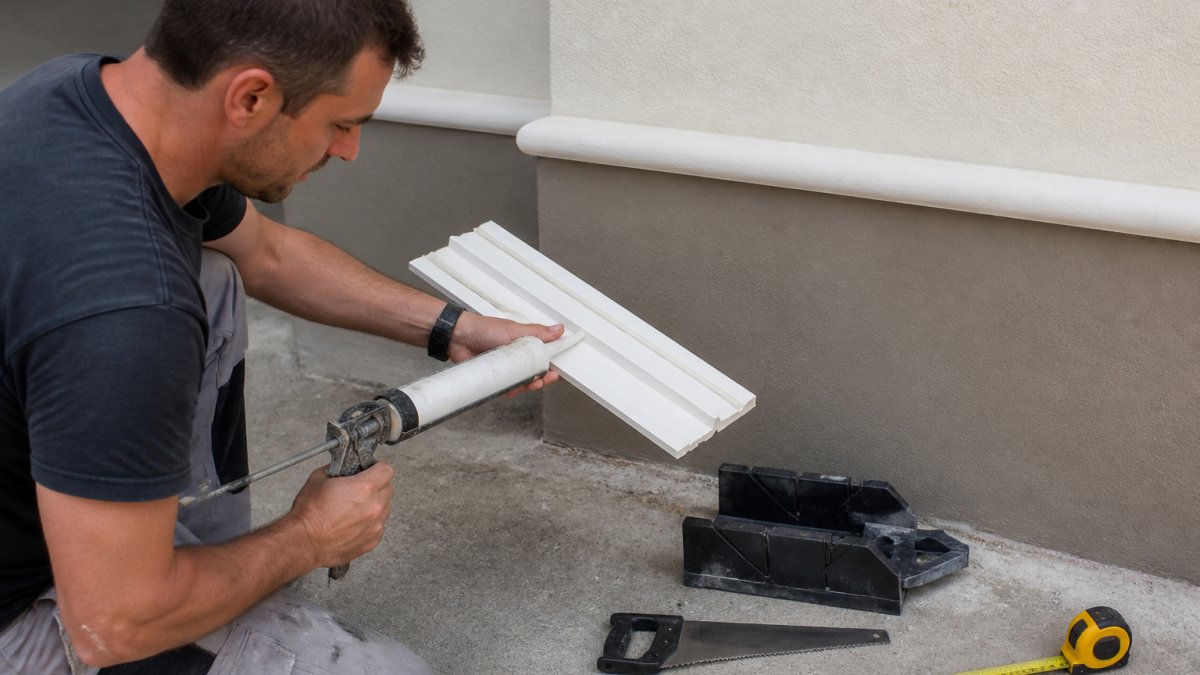
- Measure and mark. Run a chalk line or laser level along the fixing height. Check the wall is straight before you cut anything.
- Dry-fit every length. Lay out the full run first. Adjust joins so they fall away from the most visible sightline.
- Cut mitres at corners. Use a mitre box for clean 45-degree joins. Test the fit before applying adhesive.
- Apply Construction adhesive. Run a continuous bead along the back in an S pattern, plus dabs near the edges. Or a low expanding adhesive foam can also be used with a special applicator gun. Please confirm with the manufacturer as to what brands are recommended and tested.
- DO NOT mechanically fix **** NO screws or plugs are recommended *** Check with the manufacturer regarding what installation method is recommended for your shape and size mouldings before you start.
- Seal every face of the join and end. Fill mitres, butt joins and cut ends with the Patch Kit.
- Sand. Once cured lightly sand the patch and reapply, leaving a fine sand finish to match the mouldings.
- Prime and paint. Two coats of quality exterior water based paint. This is what protects the coating long term.
Common mistakes that ruin a DIY facade moulding job.
The most frequent mistake is fixing to a dirty or loose substrate. Adhesive will not bond to dust, smooth paint, flaking paint or friable render, and the profile will lift within a season.
Other failures we see regularly:
- Cutting mitres by eye instead of using a mitre box, leaving visible gaps
- Not taking time when patching joins, leaving messing viable joints.
- Running a full length without checking level, so the error compounds across the facade
- Leaving end cuts unsealed on profiles that terminate against a wall without sealing.
Each of these is a five-minute fix during installation and an afternoon of repair afterwards.
Project Cost and Budgeting for Facade Mouldings
Budgeting for facade mouldings is simpler than most homeowners expect because pricing is per length, not per square metre. Work out your total lineal metres, divide by 2.5, round up, then add consumables.
Our standard 2.5m profiles give you a clear starting point. A 160x128 profile is $106.20 per length, a 200x100 profile is $93.50, a 250x140 profile is $123.90, a 200x160 profile is $132.60, and a 300x177 profile is $166.88.

Cost Component |
What to Budget For |
|---|---|
Moulding profiles |
Lineal metres divided by 2.5, rounded up |
Adhesive and sealant |
One tube per few lengths plus spare |
Filler and sandpaper |
For fixing mitres, joins and exposed raw ends |
Exterior paint |
Two coats over the full run |
Delivery |
Quoted separately based on location |
A common mistake is ordering exactly the lineal metres required with no allowance for offcuts and mitre waste.
Conclusion: Is Professional Grade DIY Right for Your Project?
The honest answer is that professional-grade DIY facade mouldings suit most homeowners and owner-builders. If you can measure, cut a mitre and follow fixing instructions, you can install these profiles yourself. Otherwise Outside Mouldings can also supply the complete Supply & installation Package.
Outside Mouldings manufactures every profile in Australia, cuts them to order from expanded polystyrene with a sand-blend render coating, and supplies standard 2.5m lengths. We also specialise in custom-made profiles for heritage restorations and one-off architectural details.
Get started with Outside Mouldings and give your facade the depth and character of traditional masonry without the trade skills or the long scaffolding hire costs.
Frequently Asked Questions
What materials are used for exterior facade mouldings?
Exterior facade mouldings are typically made from expanded polystyrene (EPS) with a durable render-look coating. EPS mouldings are cut by a hot wire machine into profiles, bands and shapes, then coated and painted on site. They come in standard 2.5m lengths and suit both residential homes and commercial buildings. Lightweight mouldings are popular with DIY homeowners and builders.
Are polystyrene facade mouldings suitable for outdoor use?
Yes. Polystyrene facade mouldings are designed for exterior use when they have a flexible render coating and are painted correctly. The coating provides weather resistance while the EPS core keeps the profile lightweight. They are suitable for rendered walls, brickwork and most common substrates. For best results, seal cut ends and joints before painting, and check that the fixing method suits your wall type. In coastal or high-rainfall areas, use quality exterior paint to extend service life.
How do you install exterior mouldings on a rendered wall?
Start by measuring and marking a level line, then cut the moulding to length with a fine-tooth saw. Apply construction adhesive to the back in a zigzag pattern, press the moulding firmly against the rendered wall, and support it with tape or temporary bracing until the adhesive cures. Fill joints with filler, sand, reapply, let dry then paint with an exterior water based paint. Most standard profiles come in 2.5m lengths, so plan joins away from prominent sight lines.
Can DIY facade mouldings achieve a professional finish?
They can when the substrate is flat, the profiles are cut accurately and joints are filled and sanded properly. Lightweight mouldings remove the need for masonry skills, so a homeowner with basic DIY experience can get a clean result. The main variables are alignment, adhesive coverage and paint finish. Take your time on the first length, use a level and string line, and treat the joints as the detail that makes or breaks the job.
How do polystyrene mouldings compare with traditional masonry mouldings?
Polystyrene mouldings weigh a fraction of masonry, cost less per metre, and can be installed by one person without specialist tools. For DIY facade mouldings, polystyrene provides the look of rendered masonry with faster installation. Polystyrene suits decorative detail, window surrounds and parapets where weight and speed matter.

Comments