
Renovating Heritage Homes With Mouldings: A Guide
Table of Contents
- Planning a Heritage Renovation: Where Mouldings Fit
- Heritage Home Exterior Design: Identifying Period-Specific Profiles
- Traditional Moulding Profiles: Repair, Replication, and Restoration
- Exterior Mouldings for Homes: Materials, Durability, and Weather Resistance
- Heritage Home Renovation Approval: Understanding Conservation Constraints
- Balancing Original Character With Modern Functionality
- Common Installation Mistakes and How to Avoid Them
- Frequently Asked Questions
Last Updated: October 14, 2026
Planning a Heritage Renovation: Where Mouldings Fit
Renovating heritage homes with mouldings transforms a property's character, but requires planning. Cornicing, window surrounds, and quoins often hide under layers of paint or render, so first identify what's original and worth preserving.
Start with a clear plan:
- What original features do you want to keep?
- Which areas need repair versus full replacement?
- What's your budget for materials and labour?
Many find restoring original mouldings more affordable than expected, especially using lightweight polystyrene alternatives that replicate traditional profiles without skilled masonry costs.

Heritage Home Exterior Design: Identifying Period-Specific Profiles
Identifying the era of your mouldings tells you what to restore or replicate, saving time and money.
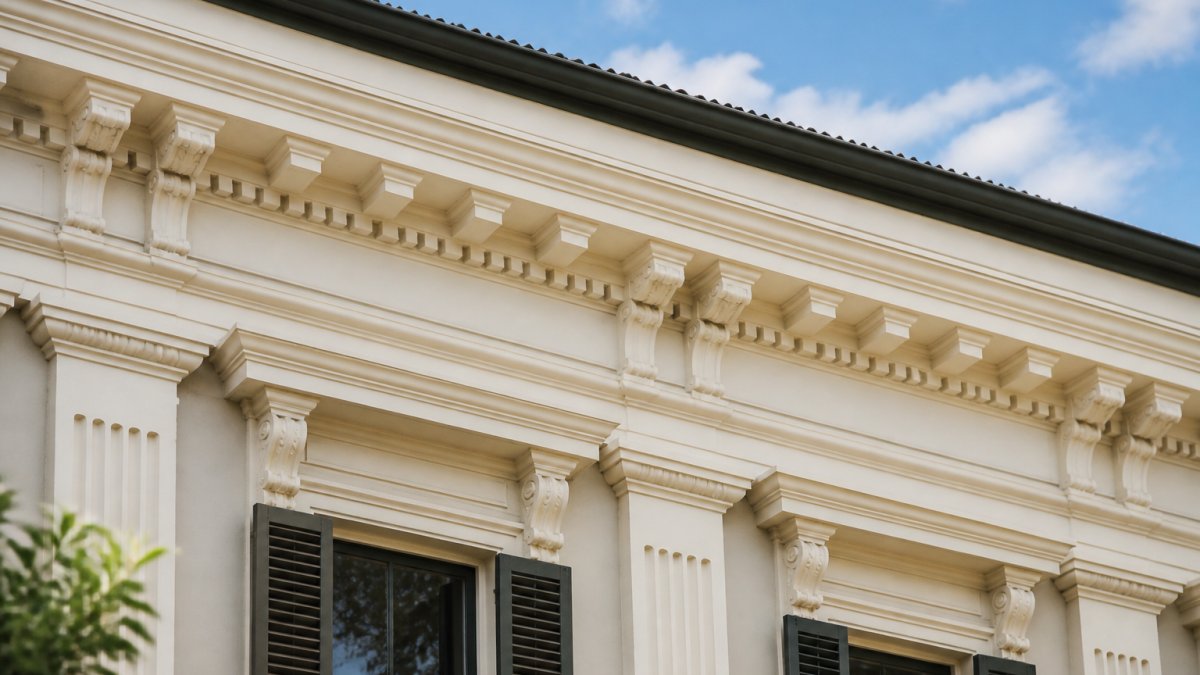
Moulding identification by era
Victorian homes (1837-1901) feature bold, heavily ornamented profiles: deep, complex cornicing, elaborate window surrounds, egg-and-dart patterns, acanthus leaves, and heavy shadow lines. Edwardian properties (1901-1910) simplify Victorian excess, still deep, but cleaner. Federation and early 20th-century homes (1910-1930) use lighter, more geometric profiles, sometimes with Art Deco influence. Queenslanders and colonial homes vary by region, with verandah cornicing often the defining feature.

Common profile shapes and their historical context
Ovolo profiles curve outward in a quarter-circle, common on window sills and simple cornicing. Cyma profiles have an S-curve, typical of higher-quality Victorian and Edwardian work, often marking the wall-to-cornice transition. Torus profiles are rounded and bulbous, appearing on bases, plinths, and decorative bands. Cavetto profiles curve inward, creating shadow lines and depth. Dentil mouldings feature small rectangular blocks, typical of Georgian and Federal styles.
Knowing these profiles helps you source accurate replacements. Many heritage homes mix profiles, a cyma cornice with ovolo window surrounds, so identify each separately to restore authentically.
Traditional Moulding Profiles: Repair, Replication, and Restoration
Once you've identified your profiles, you face a choice: repair or replace, depending on damage severity, cost, and timeline.
Assessing damage and deciding between repair and replacement
Minor surface damage, cracks, small chips, paint failure, can often be repaired: clean out loose material, fill, repaint.
Moisture damage and movement are more serious. If the moulding is soft, crumbly, or moving, repair won't hold.
Widespread decay or missing sections make replacement the only option.
Lead paint is common on older homes. Test before disturbing any painted moulding; removal requires specific precautions.
The decision tree:
- Sound structure + surface damage = repair
- Structural failure or widespread decay = replace
- Lead paint = encapsulate or replace
Step-by-step moulding installation and finishing
Step 1: Prepare the substrate. Remove old moulding carefully, clean thoroughly, and fill gaps.
Step 2: Plan your layout. Mark positions with a level and chalk line.
Step 4: Position and secure. Press into place and use temporary supports if needed.
Step 6: Prime and paint. Use exterior-grade primer plus two coats of quality exterior paint.
Exterior Mouldings for Homes: Materials, Durability, and Weather Resistance
Material choice determines how long your mouldings last, how they move with the building, and what they cost to maintain. The four options on a heritage exterior, cement render, lime plaster, timber, and lightweight polystyrene with a render coating, behave very differently.
How each material actually performs
Cement render is dense, hard and dimensionally stable once cured, suiting heavy Victorian and Edwardian profiles.
Lime plaster is the traditional choice on many pre-1930s facades.
Timber mouldings (often western red cedar or durable hardwood) are common on verandahs, bargeboards and window surrounds.
Polystyrene with a sand-blend render coating is a lightweight expanded polystyrene core finished to mimic traditional render.
Cost factors that actually move the number
The headline price of a moulding is rarely the whole cost. The factors that shift a budget most are:
- Profile complexity. Simple ovolo or cavetto is quick to produce; deep cyma recta, dentil runs and egg-and-dart need more machining or hand-finishing.
- Run length. Long uninterrupted cornices and parapet bands cost more per metre due to scaffolding, access and joint alignment.
- Height and access. Anything above single-storey typically needs scaffolding or an elevated platform, which can rival material cost on a small job.
Repair is usually cheaper when the moulding is sound and damage is surface-level; replacement wins when more than roughly a third of a run is decayed, missing or delaminated, because matching a partial repair costs almost as much as a clean replacement.
Durability and maintenance expectations
Traditional cement and lime render, well applied over a stable substrate, can last 50 years or more with periodic repainting. Timber lasts well if kept painted and detailed to shed water, but neglected timber deteriorates quickly.
Across all materials, the maintenance cycle is driven by exposure. A north- or west-facing facade with full sun and driving rain needs repainting sooner than a sheltered elevation, commonly every 7 to 10 years, with more frequent touch-ups on exposed faces.
Matching material to the era
As a rule of thumb, pre-1910 facades with deep, ornate profiles suit render or plaster reproduction, while simpler Federation and interwar profiles are well served by timber or lightweight alternatives. The key test is visual: does the replacement read as the same material and depth from the street?
guidance on selecting render and plaster materials for heritage facades
Heritage Home Renovation Approval: Understanding Conservation Constraints
Moulding work sits where heritage controls bite, because external mouldings are usually visible from the street and often form part of what makes a place significant. Understanding approval before ordering materials is the difference between a smooth project and a costly rebuild.
Decorative Exterior Moulding : 150x75 Profile OI460 →
What actually triggers a heritage control
Heritage protection in Australia operates at several overlapping levels:
- Local heritage listing through a council planning scheme, the most common control, typically covering external alterations visible from a public place.
- State or territory heritage registers, applying to places of state significance and usually involving a dedicated heritage authority alongside the council.
- Commonwealth heritage listing, for a small number of places of national significance.
The practical question is not "is my house listed?" but "does this specific change need consent?" Like-for-like moulding replacement is treated very differently from changing a profile, adding a decorative element, or removing original fabric.
The conservation principles a heritage officer will apply
Assessments are guided by well-established conservation principles, and knowing them helps frame your application:
- Retain original fabric where possible. Repair over replacement; replacement over removal.
- Like-for-like replacement. New work should match the original in profile, dimension, material and finish.
- Reversibility. New work should be removable later without damaging significant fabric.
An application saying "we will repair sound sections, replicate the missing profile exactly from a mould taken on site, and finish to match" is far easier to approve than one saying "we will replace the cornice with a modern lightweight profile." The second may still be acceptable, but needs justification.
How to document a moulding change for approval
A well-prepared application usually includes:
- Photographs of the existing moulding, including close-ups of the profile and any damage.
- A profile drawing or rubbing from an intact section, so the proposed replacement can be compared directly.
- A schedule identifying which sections are repaired, replaced, or new.
Where original mouldings are missing entirely, a heritage officer will often accept a profile drawn from a comparable building of the same era and style, or from a pattern book, provided the reasoning is documented.
Typical timeframes and sequencing
Approval timeframes vary by council and application complexity. A straightforward local heritage application for like-for-like moulding replacement might take several weeks, while a state-listed property or a proposal involving new profiles or additions can take considerably longer and may require referral to a heritage authority.
Sequence the work so approval is in hand before committing to materials or scaffolding. Ordering custom profiles or booking trades before consent is issued is one of the most common and expensive mistakes on heritage projects.
When you need a specialist
For complex profiles, significant fabric, or state-listed properties, engaging a heritage consultant or conservation architect early usually saves money overall. They can advise on what is genuinely significant, prepare the documentation a heritage officer expects, and identify where a sympathetic modern alternative is likely to be accepted. For simple like-for-like repairs on a locally listed home, many owners manage the application themselves with good photographs and a clear scope of works.
Australian heritage conservation principles and guidance
Balancing Original Character With Modern Functionality
Heritage homes often feel cramped by modern standards, tiny kitchens, bathrooms lacking storage, narrow hallways. The challenge is adding function without erasing character.
Integrating contemporary design without erasing period detail
Interior walls offer flexibility.
Kitchen and bathroom updates can stay hidden.
Storage solutions integrate into existing spaces. Built-in cabinetry matches period style, with modern materials hidden behind period-appropriate doors and mouldings.
Lighting is often overlooked. Modern recessed downlights clash with heritage aesthetics, consider period-appropriate fittings or wall lights that complement original mouldings.
Updating interiors whilst preserving the facade
Your exterior is your heritage home's identity. Keep it intact.
Modern open-plan layouts work inside period shells. Knock out interior walls as needed. Keep the facade, cornicing, and external mouldings untouched.
Original skirting boards and door frames add character to modern interiors. Don't remove them. Paint them to match contemporary colour schemes.
Common Installation Mistakes and How to Avoid Them
Mistake 1: Poor substrate preparation. Surfaces must be clean, flat, and stable. Dirt and dust prevent adhesive bond; uneven surfaces create gaps.
Mistake 2: Inadequate adhesive. Thin beads fail under weather stress. Use generous, continuous beads of exterior-grade construction adhesive.
Mistake 3: Rushing paint application. One coat is never enough.
Mistake 4: Ignoring drainage. Water is the enemy of mouldings.
Mistake 5: Mixing materials without planning. Combining timber, render, and polystyrene requires careful detailing, expansion rates differ and movement causes cracks.
| Common Mistake | Consequence | Prevention |
|---|---|---|
| Poor substrate prep | Moulding gaps, water entry, early failure | Clean, level surface before installation |
| Thin adhesive beads | Bond failure under weather stress | Use generous, continuous adhesive beads |
| Single paint coat | Paint peels, moulding exposed to weather | Prime plus two finish coats minimum |
| Poor drainage | Water damage, rot, structural failure | Fix guttering and slope render away |
| Rushing installation | Movement, cracks, misalignment | Use temporary supports, let adhesive cure |
Renovating heritage homes with mouldings is achievable for most homeowners.
Frequently Asked Questions
How do you renovate a heritage home without losing its character?
Start by identifying original architectural details, mouldings, trims, cornicing, and window surrounds, that define the home's era. Restore these elements using period-appropriate profiles and materials. When updating interiors or adding modern features, keep changes behind the facade or use sympathetic design that respects the home's historical style. Consult heritage guidelines in your local area before making external alterations, as many heritage properties require approval for renovations.
What exterior mouldings suit a heritage-style home?
The right mouldings depend on your home's architectural era. Victorian homes typically feature ornate cornicing and deep profiles; Federation and Edwardian properties use simpler, more geometric designs; and older colonial homes may have minimal moulding. Polystyrene mouldings with a render finish replicate traditional masonry profiles convincingly whilst being lightweight and easy to install. Products like the 150x75 Profile or corner quoining can add authentic character detail without the labour intensity of traditional stone or plaster.
Do you need approval to alter a heritage-listed home?
Yes. If your property is heritage-listed, you must obtain approval from your local heritage authority before making external alterations, including changes to mouldings, trims, or facade details. Requirements vary by state and council, so contact your local planning department early in the renovation process. Non-listed heritage homes in conservation areas may also have restrictions. Factor this into your project timeline.
How do you choose moulding profiles for a heritage facade?
Research your home's architectural style and era, examine original mouldings still in place, look at comparable period homes, or consult heritage references specific to your region. Match profile depth, width, and detail level to the original. If originals are damaged beyond repair, replicate them using period-appropriate measurements. Custom moulding options allow you to recreate exact profiles, ensuring the renovation looks historically accurate whilst using modern, durable materials.

Comments